
Budget-Friendly Tips For Your Outdoor Lighting
Category Lifestyle and Decor
Light up your life with these creative DIY solutions for outdoor lighting.
Nothing creates the right atmosphere quite like lighting does and this is particularly true when it comes to illuminating your outside entertainment area. We scoured the web and have found a few really nifty ways to light up your life, without breaking the bank.
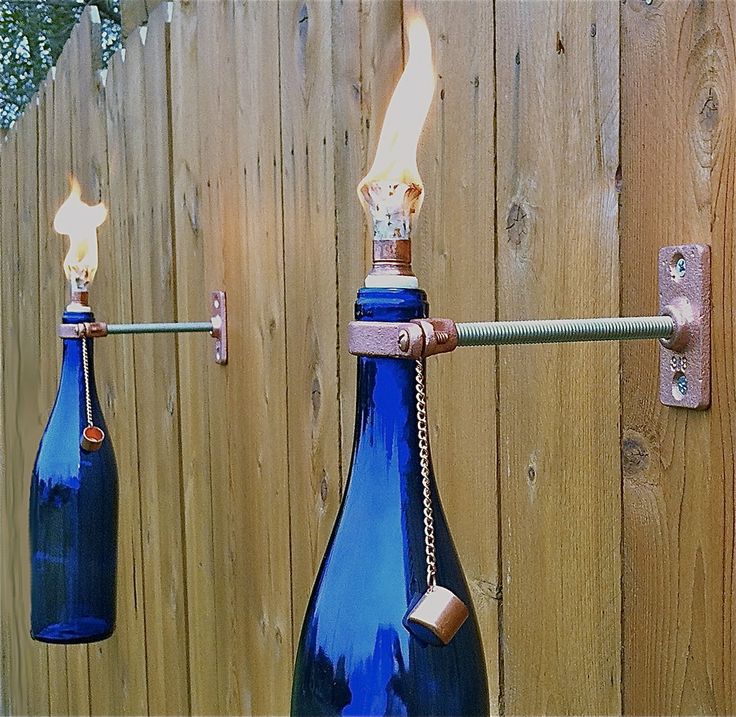
Wine bottle torches
You will need:
- One clean wine bottle (you can use just about any type of bottle, providing the neck is wide enough to insert a wick)
- A wide wick (these can be purchased at hardware shops or larger supermarkets.)
- Citronella lamp oil
- A metal washer – the size will vary according to the bottle being used, but it should measure the same as the bottle neck opening.
- Glass beads or rocks small enough to feed through the bottle neck.
Directions:
- Feed the glass beads into the bottle – the more the merrier as this will cut down on the amount of oil needed.
- Feed the wick through the washer, leaving roughly 7mm protruding from the top. The wick and washer should fit snugly because if you leave a gap, air could get in which will cause the bottle to fill with smoke.
- Pour the oil into the bottle using a funnel, ensuring that half the wick will be submerged.
- Feed the wick into the bottle and allow it to soak up some of the citronella oil before lighting.
Warning
Place bottle on a sturdy surface and out of the reach of children. Only use outside. (www.whenthepigsfly.com/2012/01/diy-wine-bottle-torches.html)
Hanging Glass Jar Lanterns
You will need:
- Canning jars or discarded food jars
- Wire (coat hangers work well)
- Wire cutters
- A long handled braai lighter or long matches
- Tea light candles
- Tape measure
- Long nose pliers
Directions
- Wash and dry the bottles, removing any labels and glue marks.
- Cut a piece of wire about 7cm bigger than the circumference of the opening of the jar. Bend it around the opening to create a circle, but don't twist the ends just yet. Cut another piece of wire (about 28cm long) for the handle. Bend the longer piece of wire into the shape of a ‘u’ then twist each end around opposite sides of the smaller, circular piece of wire.
- Wrap the circular piece of wire around the mouth of the jar again, ensuring the wire fits into the grooves of the jar, then twist the ends together, using pliers if necessary. Slide each end of the handle to the centre of the jar in order for the lantern to hang straight.
Tin Can Lanterns
You will need:
- Standard sized tin cans
- Hammer and an assortment of nails
- Spray paint
- Sand
- Tea lights
Directions:
- Wash cans, removing glue and other debris.
- Fill the cans with water and place in the freezer until completely frozen. This will stabilise the can and prevent it from bending as you work.
- Remove from the freezer and using the hammer and nail, pound a hole near the top of the can. Knock another hole in the other side of the can – this will be used to secure the handle at a later stage.
- Create the desired design on the can by hammering the nail into the sides of the can.
- Once you've finished, allow the ice to defrost. Dry thoroughly and knock the bottom of the can back into shape, if necessary (freezing may cause the bottom of the can to bulge).
- Spray paint the can.
- Place sand in bottom of tin and place tea light inside.
Source - PrivateProperty / Lea Jacobs
Author Lea Jacobs - Private Property
Published 29 Dec 2015 / Views 4